 Login / Register
First Time Setup Wizard
As soon as the theme is activated from Appearance > Themes, one time setup wizard will be initiated if the theme is activated for the first time. The setup wizard has following stages:
Step 1: Install Child Theme

- This step will let you build and activate child theme. More about child theme here
Step 2: Activating your Pro theme
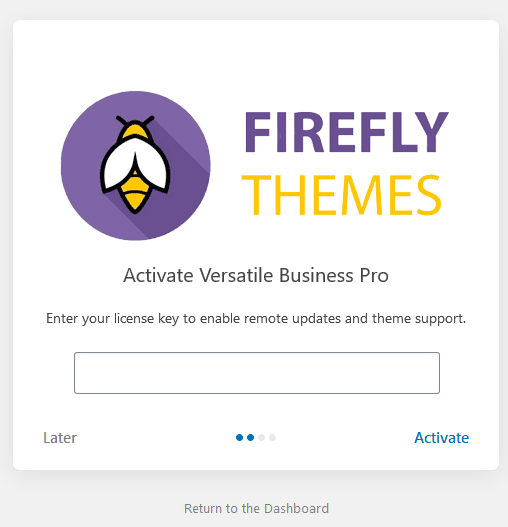
- You can enter your license key from you my-account page, you need to activate the license to get automatic updates for the theme.
Step 3: Importing Demo content
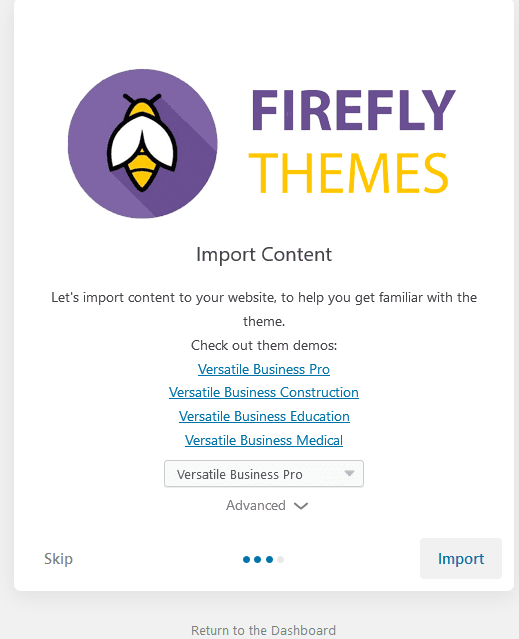
- Before initiating this step, make sure you are certain to import demo content as it might overwrite your current data in your site.
- You can check out our demos here, or just click on the list of links provided to checkout the demos.
- Sit Back and relax while the import process completes to 100%
Step 5: All done!!!
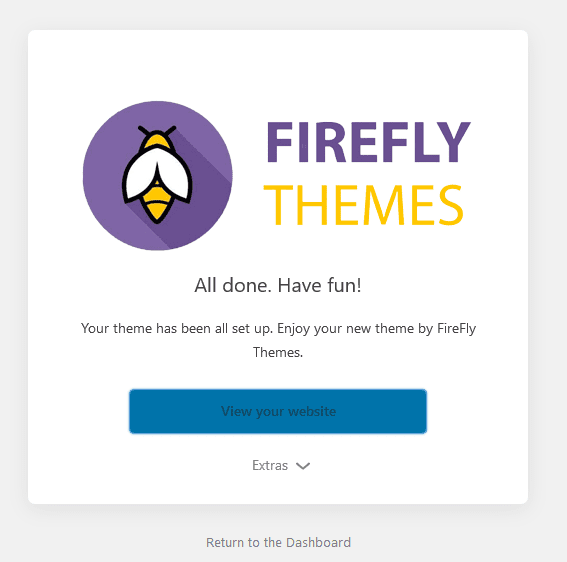
- Your theme has been all set up. Enjoy your new theme by FireFly Themes.
Demo Import
In case you skipped the importing demo on Setup stage or want to import a new demo, you can use following steps to import demo content.
Note: Install Contact Form 7 Plugin to import contact form, MC4WP: Mailchimp for WordPress for footer newsletter.
- Install One Click Demo Import plugin in your site
- After installing the plugin,
- Go to Appearance > Import Demo data
- Select your desired demo from the list
- Finally, click Import Demo Data Button
- Wait for the import to finish
- You are done!!!
Add Logo
- Go to Appearance > Customize > Site Identity
- Click in “Select Logo”, you can upload a new file or use media library
- Then click publish to save your logo
Colors
- Go to Appearance > Customize > Colors
- Here you have option to change various sections
- Then click publish to save colors
Menu
Elite Commerce Pro supports Primary Menu and Social Menu. You can also enable/disable Primary and Dark Primary Nav
- Go to Appearance > Customize > Menu > View All Location
- You can add and edit Primary menu and Social Menu as per your requirement
- Here you can enable/disable primary menu and search on primary menu
- Then click publish to save your menus
Associate Logo
Elite Commerce Pro have associate logo, here you can add the brand logos you work with. You can add page, post, category, custom and tags as associate logo. Follow following steps to add associate logo in your website:
- Go to Appearance > Customize > Sortable Sections > Associate Logo
- To activate associate logo click on “Visible On” button you can either show it on entire pages or homepage/frontpage or custom pages
- Select type as page, post, category, custom or tags as you associate logo, then add associate logo accordingly
- Edit Section Top Sub-title, Section Title and Subtitle as per your requirement
- Change layout under “Layout” option, to display total number of logos at once
- Under “Number” add total numbers of associate logos you want to display
- Additional option to enable/disable carousel slider, edit transition speed, enable/disable loop, navigation and pagination
- Select different colors various section under “Color”
- Finally, click publish to save your associate logo
Content Widget Areas (1, 2 & 3)
You can add content inside your widget using this option.
- Go to Appearance > Customize > Sortable Sections >Content Widget Areas 1, 2 or 3
- Enable content widget area by click on “Visible on” button you can either show on entire pages or homepage/frontpage or custom pages
- After enabling you will find “For this Widget Area Options click here” click on the link and add widget as per your requirements
- Finally, click publish to save your Content Widget Areas
Contact Form
Elite Commerce Pro supports page, post, category, tag and custom as contact form. You can aslo add Map Code and Here are steps to add contact form in your website:
- Go to Appearance > Customize > Sortable Sections > Contact Form
- Enable contact form by clicking on “Visible on” button you can either show on entire pages or homepage/frontpage or custom pages
- Under “Type” choose page, post, category, tag or custom you want to display as contact form, then add contact form accordingly
- Edit Top Subtitle, Title and Content(in custom) as per your
- Add address, icon class, content, email. You can add icon in each section a per your need
- Finally, click publish to save your contact form
Hero Content
Hero Content presents an overview of the site’s most important content. Elite Commerce Pro support page, post, category, tag and custom as Hero Content. Here are steps to add hero content:
- Go to Appearance > Customize > Sortable Sections > Hero Content
- Enable hero content by clicking on “Visible on” button you can either show slider on entire pages or homepage/frontpage or custom pages
- Under “Type” choose page, post, category, tag or custom you want to display as hero content, then select hero content accordingly
- Change Top Subtitle, title, content, button text and button link as per your requirement
- Under content position and text align you can change placements of content
- Change various color section in hero content as per your need
- Then click publish to save your hero content
Featured Content
Elite Commerce Pro support page, post, category, tag and custom as Featured Content. Here are steps to add featured content:
- Go to Appearance > Customize > Sortable Sections > Featured Content
- Enable featured content by clicking on “Visible on” button you can either show on entire pages or homepage/frontpage or custom pages
- Under “Type” choose page, post, category, tag or custom you want to display as hero content, then select featured content accordingly
- You can edit Section Top Sub-title, Section Title, Section Subtitle, Button Text and Button Link under their respective field
- Change various color section in hero content as per your need
- Then click Publish to save your featured content
Featured Video
Elite Commerce Pro supports featured video, you can add youtube links to this sections
- Go to Appearance > Customize > Sortable Sections > Featured Video
- Enable featured video by clicking on “Visible on” button you can either show on entire pages or homepage/frontpage or custom pages
- Change Image, Top Subtitle, Title, Content under respective field
- Under “Video Link” add link of video you want to display in the section
- You can edit Button Text, Button Link, content position and text align as per your requirements
- Change various color section in featured video as per your need
- Then click Publish to save your featured video
Slider
Elite Commerce Pro supports page, post, category, tag and custom as slider, you can also change various color section in slider which is present in our premium version. Follow following steps to add sliders to you website:
- Go to Appearance > Customize > Sortable Sections > Slider
- Enable slider by clicking on “Visible on” button you can either show slider on entire pages or homepage/frontpage or custom pages
- Under “Type” choose page, post, category, tag or custom you want to display as slider
- Then select under Item #1, Item #2, Item #3 and so on
- Change various color section in slider as per your need
- Style, 5 different styles to display your slider
- Text Align, text alignment in Left, Center or Right, under each items
- Video Link, option to add video under each items
- Add “Title”, “Content”, “Button Text”, “Button Link”, “Secondary Button Text”, “Secondary Button Link” under its respective titles
- Then click publish to save your slider
Advanced option in Slider
Elite Commerce Pro supports advanced features for your slider.
Click this Link, to add advanced features in slider
Promotion Headline
Elite Commerce Pro supports post, page, category, tags and custom as promotion headline. Here are steps to add promotion headline:
- Go to Appearance > Customize > Sections > Promotion Headline
- Enable promotion headline by clicking on “Visible on” button you can either show on entire pages or homepage/frontpage or custom pages
- Select type page, post, category, tag or custom, you want to highlight as promotion headline, then select promotion headline accordingly
- You can edit Section Top Sub-title, Section Title, Section Subtitle, Button Text and Button Link under their respective field
- Change various color section in promotion headline as per your need
- Click publish to save your promotion headline
Promo Section (Promotion section two)
Promo section is one of our new feautures of firefly theme, it can be used to highlight the products or service you want to make stand out. It has very unique, elegant design with lots of customizable features. Here is how you add Promo Section (Promotion section two) to your website.
- Go to Appearance > Customize > Sections > Promo Section (Promotion section two)
- Enable promo sections by clicking on “Visible on” button you can either show on entire pages or homepage/frontpage or custom pages
- Under “Layout” and “Number” select the number of items you want to display and layouts according to your requirement
- Under Item#1, Item#2 add tagline, title, more text and more link for each items
- Change various color section in promo section as per your need
- Click publish to save your promo section
Stats
- Go to Appearance > Customize > Sections > Stats
- Enable stats by clicking on “Visible on” button you can either show on entire pages or homepage/frontpage or custom pages
- Under “Style” select style for stats as style one or style two
- Change Background Image, enable/disable image overlay, number of items to be displayed
- Under Item#1, Item#2 add Icon, Number and Label as per your requirements
- Change various color section in stats as per your need
- Click publish to save Stats
What We Do
Elite Commerce Pro supports what we do section, you can choose content type as post, page, category, tag or custom. Here are steps to add what do we do section in your website:
- Go to Appearance > Customize > Sortable Sections > What We Do
- Enable What We Do by clicking on “Visible on” button you can either show slider on entire pages or homepage/frontpage or custom pages
- Select type page, post, category, tag or custom, you want select as what we do, then select items accordingly
- Choose text alignment as left, center or right
- You can edit Section Title Text align, Top Sub-title, Section Title and Section Subtitle under their respective field
- Additional option to select layout and numbers of sections to showcase
- Change various color section in team as per your need
- Finally, click publish to save your what we do section
Testimonials
Testimonials section helps your audiance to know what your goods and services are like. You can add customers testimonials to grow trust among you customers. Select content type as page, post, category, tags or custom as testimonial.
Here are steps to add testimonials in your theme:
- Go to Appearance > Customize > Sortable Sections > Testimonials
- Enable Testimonials by clicking on “Visible on” button you can either show slider on entire pages or homepage/frontpage or custom pages
- Select type page, post, category, tag or custom, you want select as what we do, then select testimonials accordingly
- Choose text alignment as left, center or right
- You can edit background image,section top sub-title, section title, and section subtitle under their respective field
- Additional option to select layout and numbers of testimonials to showcase, enable/disable carousel slider
- Change various color section in testimonials as per your need
- Finally, click publish to save your testimonials
Breadcrumb
Breadcrumb option indicate the current page’s location within a navigational hierarchy. This theme supports option to enable or disable breadcrumb.
- Go to Appearance > Customize > Theme Options > Breadcrumb
- Enable or Disable as per your requirement
- Then click publish to save
Buttons
Change button radius under buttons option
- Go to Appearance > Customize > Theme Options > Buttons
- Increase boarder radius up to 100
- Then click publish to save
Excerpt Option
Excerpt Option is used to show the words of your content. Default length of content is 20words.
- Go to Appearance > Customize > Theme Options > Excerpt Option
- Change Excerpt Length (words) and Continue Reading Text as per your requirement
- Then click publish to save changes
Fonts
Elite Commerce Pro have different fonts option of various section, you can easily edit different fonts as per you need
- Go to Appearance > Customize > Theme Options > Fonts
- You can edit different fonts for each section inside fonts, under respective field
- Then click publish to save changes
Footer
Footer option to is to change footer styles and footer copyright text. Elite Commerce Pro also have additional options like footer color scheme, footer style
- Go to Appearance > Customize > Theme Options > Footer
- Edit “Footer Copyright Text” and footer style as per you requirement
- Change footer color scheme, footer style too
- Finally, click publish to save changes
Layout
Elite Commerce pro supports different layouts for different pages
Site Layout
Select site layout as “Fluid” or “Boxed” under Site Layout option, which will set layout for the entire website
Default Layout
There are 4 different types of default layouts, Right Sidebar, Left Sidebar, No sidebar or Default sidebar. Default Layout sets the layout for entire website
Homepage/Archive Layout
There are 4 different Homepage/Archive Layout Right Sidebar, Left Sidebar, No sidebar or Default sidebar. Homepage/Archive Layout set the layout for homepage and archive pages
WooCommerce Pages Layout
WooCommerce page layout option set the layout for WooCommerce pages. It also have 4 different layout to choose from: Right Sidebar, Left Sidebar, No sidebar or Default sidebar
Homepage/Archive Posts Content Layout
Homepage/Archive posts content layout sets layout for posts on blog page and archive pages. It have 6 different options: Grid, Excerpt Image Top, Excerpt Image Left, Excerpt Image Right, Full Content(No Featured Image), Full Content Image Top
Header Options
Elite Commerce Pro supports different header option where you can choose 6 different header styles. Here is how you add header option in your website:
- Go to Appearance > Customize > Theme Options > Header Options
- Add To Ad image and image link
- Under “Header Style” choose 5 different header styles according to your preferance, you can enable/disable sticky header, enable/disable search and login icon/link
- Choose Header Top color as “Dark” of “Light”
- Edit Text, Email, Phone, Address, Open hours, Button Text and Button link under respective title
- Finally, click publish to save changes
Header Top Options
Elite Commerce Pro supports header top option here you can find different options to add up in your header area. Here is how you add header top options:
- Go to Appearance > Customize > Theme Options > Header Top Options
- Under “Header Top Color” choose dark or light color scheme
- Choose Header Top color as “Dark” of “Light”
- Edit Text, Email, Phone, Text Below Phone, Address, Open Hours, Button Text and Button link under respective title
- Finally, click publish to save changes